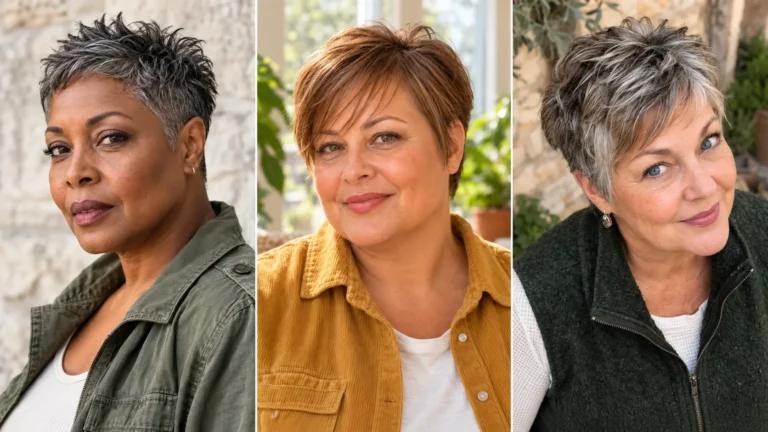
Face Framing Layers for Fine Hair: 13 Cuts That Add Shape Without Losing Density
You asked for something soft around your face. You got two limp pieces hanging either side of your jaw like whiskers, doing nothing, catching on your collar, and refusing to sit anywhere useful. Or worse, you lifted your hair a week later and realized your sides had gone see-through where the stylist carved into them.
Both disasters come from treating face framing as layering. They are not the same operation. Layering removes weight across the whole head, and fine hair simply does not have the density to survive that.
Face framing, done properly, is a localized carve. A small amount of hair at the very front is shaped, and everything behind it stays exactly as it was. Your perimeter is never part of the conversation.
When it works, you end up with two visible tiers of hair around your cheekbones instead of one flat sheet. Light hits the shorter tier and the longer one separately, and that doubled reflection is what makes the whole head read as considerably thicker than it is.
The Three Golden Rules of Face Framing on Fine Hair
Rule One: The Landing Point Starts at the Cheekbone
Where the shortest framing piece begins decides everything. Start it at the temple and you have just removed hair from the spot where fine hair is already sparsest, which leaves a hollow you will notice every time you tuck your hair back.
Begin at the cheekbone or lower, and the shortest piece sits where your face has width to balance. Nothing is taken from the temple area, so the coverage up there stays intact.
Chin level is the safest landing point of all if your density is genuinely low. It gives you visible shape without touching anything above your ear.
Rule Two: The Perimeter Is a Shield
The back of your head and the bottom two inches of your length are what people read as thickness from a few feet away. Every strand ending at the same point makes that edge look like a solid mass.
Face framing should never touch that. No connecting layers running around the back, no thinning through the ends to help the front pieces blend in, and nothing removed below your shoulders.
If your stylist says the framing needs to be blended through the back to look natural, they are describing a layered cut, not a framing carve. Those are different services and only one of them protects you.
Rule Three: Slide-Cut Downward, Never Razor
Slide cutting means the scissors travel down the length of the section with the blades slightly open, shaping the piece gradually rather than chopping a hard line into it. Done downward on dry hair, it gives you a soft taper you can actually see the effect of.
A razor produces the same softness on paper and frayed ends in practice. It slices the strand at a long angle, leaving the cuticle open, and on fine hair those ends split and fly away within weeks.
Thinning shears belong to the same category of problem. They remove strands at random depths along the section, and on low-density hair that reads as patchiness rather than texture.
13 Face Framing Cuts for Fine Hair
Each cut below carves the front differently while leaving the perimeter alone. Read the landing point for each one, since that single detail is what separates a cut that lifts your features from one that hollows out your sides.
1. The Chin-Grazing Slide Layers with Blunt Perimeter

The simplest version and the one I recommend to anyone who has been burned before. Two soft pieces slide-cut from chin level downward, with the rest of the hair left as one solid length.
Because nothing starts above the chin, your temples and sides keep every strand they had. The shape you see is entirely down to the taper on those front pieces, which is enough to change how a cut sits on your face.
- Best for: Anyone nervous after a bad layering experience, and genuinely low density.
- Where the layers start: Chin level, with a soft downward taper into the length.
- Daily 5-minute styling: Bend just the front pieces away from your face with a flat iron or small barrel, and leave the back alone.
- Skip it if: You want visible movement through the back, since this cut is deliberately front-only.
2. The Scaled-Down Butterfly Framing Cut

A butterfly cut folds shorter front sections back like wings over longer length behind. The scaled-down version uses three or four wings instead of the dozen the trend usually calls for.
Those few wings create a second visible tier around the cheekbones, which is the doubling effect in its clearest form. Keeping the count low is what stops it draining the sides.
- Best for: Medium to long fine hair, and anyone who wants visible volume without losing length.
- Where the layers start: Cheekbone level for the shortest wing, angling down toward the jaw for the rest.
- Daily 5-minute styling: Round-brush the wings back and away from your face, then let them fall forward as they cool.
- Skip it if: Your hair is thin throughout rather than just flat, because even a few wings cost you some side density.
3. The Collarbone Lob with Feathered Jaw Strands

A blunt lob sitting just above the collarbone, with two feathered pieces carved at jaw level and nothing else touched.
The jaw is a flattering place to put softness on almost every face shape, because it breaks the straight vertical line running down from your ear. The blunt bottom line stays fully intact underneath.
- Best for: Softening a strong or changing jawline, and fine hair that still has reasonable length.
- Where the layers start: Jaw level, feathered with scissors rather than sliced.
- Daily 5-minute styling: Mousse at the roots, rough-dry, then flick the jaw strands outward with your fingers as the hair cools.
- Skip it if: Your ends have already gone wispy, since a lob at this length needs weight at the bottom to hold its line.
4. The Soft Curved Inverted Midi with Front Taper

Slightly shorter at the back with the length angling longer toward the front, plus a gentle taper carved into the front sections.
The angle does the framing work almost by itself. Hair travelling from a higher back to a lower front creates a diagonal line along your jaw, and the added taper softens where that diagonal meets your face.
- Best for: Flat crowns, and anyone who wants shape from the cut rather than from styling.
- Where the layers start: The taper begins around the jaw, with the overall angle doing the rest.
- Daily 5-minute styling: Lift the back as you dry it, then smooth the front sections down and slightly forward.
- Skip it if: You wear your hair up most days, because the shorter back sections work loose from an elastic.
5. The Wispy Curtain Layers on Long Fine Hair

Long hair kept at full length with soft curtain-style pieces carved at the front, parting in the middle and sweeping outward.
Long fine hair tends to hang as two flat panels either side of the face, which drags the features down. Curtain framing opens those panels up and gives the eye somewhere to travel other than straight down.
- Best for: Long fine hair you refuse to cut, and anyone who wants change without losing an inch of length.
- Where the layers start: Cheekbone for the shortest piece, sweeping down and outward to about the collarbone.
- Daily 5-minute styling: Blow-dry the front pieces back and away from your face with a round brush, then let them settle.
- Skip it if: Your roots go flat quickly, since long hair gives you density but very little lift.
6. The French Chin Bob with Soft Front Taper

A precise blunt bob at the chin with only the two front pieces softened, everything else cut in a single clean line.
The blunt line is the densest edge fine hair can be given, and the light taper at the front keeps it from looking severe. It is the highest-density-per-inch cut on this list.
- Best for: Genuinely thin hair, and anyone who wants the maximum illusion of thickness.
- Where the layers start: Right at the chin, with the taper carved into only the front inch or two of hair.
- Daily 5-minute styling: Round-brush the ends slightly under, then flick the front pieces forward with your fingertips.
- Skip it if: You have a short neck, in which case dropping the line an inch lower is more comfortable.
7. The Bottleneck Face-Framing Lob

Borrowed from the fringe technique of the same name. The front sections are cut narrow and short in the center, then widen and lengthen sharply as they move outward toward the ears.
The narrow center means barely any hair is removed, while the flaring sides blend seamlessly into your length. You get the visual effect of a much bigger carve at a fraction of the density cost.
- Best for: Round and fuller faces, and anyone who found standard framing too wide across the front.
- Where the layers start: A narrow section at cheekbone level, lengthening outward toward the jaw and below.
- Daily 5-minute styling: Dry the center section down and the flared sides outward with a small round brush.
- Skip it if: You have a hairline cowlick at the front center, since the narrow section has no room to disguise it.
8. The Cascading Cheekbone-to-Collarbone Midi

Length just past the shoulders with framing pieces that cascade gradually from cheekbone down to collarbone, each one slightly longer than the last.
The gradual descent is what makes this look expensive. Instead of two obvious pieces, you get a continuous soft edge running down the side of your face, which reads as movement rather than as layers.
- Best for: Longer fine hair, and anyone who dislikes how obvious two-piece framing can look.
- Where the layers start: Cheekbone for the shortest piece, cascading in small increments to collarbone.
- Daily 5-minute styling: Curl the front sections away from your face in two or three passes, and leave the back straight.
- Skip it if: Your hair is thin at the sides, because a cascade needs several pieces and each one takes a little.
9. The Soft Curved Wedge with Feathery Front Pieces

Weight built into a rounded shape at the back of the head, tapering toward the nape, with light feathering carved at the front.
Fine hair often exposes a flat area at the back of the skull that nothing else in your cut addresses. Building roundness there balances your profile, and the feathered front keeps the face side from looking heavy by comparison.
- Best for: Anyone whose head is flat at the back, or whose cut looks better from the front than from behind.
- Where the layers start: Jaw level at the front, with the back shaped through graduation rather than framing.
- Daily 5-minute styling: Dry the back lifted out from your head, let it drop, then soften the front with your fingers.
- Skip it if: You tie your hair back regularly, since the shorter nape section escapes an elastic.
10. The 90s Fluffy Blowout Face-Framing Layers

Framing pieces cut to flick outward and away from the face, styled with a round brush so they lift off the cheeks rather than lying on them.
Fine hair benefits enormously from this shape, because the flick physically holds the hair off your skin. Hair that touches your face flattens and picks up oil, and hair that stands away from it catches light instead.
- Best for: Fine hair that goes flat against the cheeks by midday, and anyone who enjoys a few minutes with a brush.
- Where the layers start: Cheekbone level, cut to angle outward rather than straight down.
- Daily 5-minute styling: Roll the front pieces up and away on a large round brush, blast with cool air, then release them.
- Skip it if: You air-dry every day, because this shape needs the brush to look intentional.
11. The Modern Low-Density Shag Framing
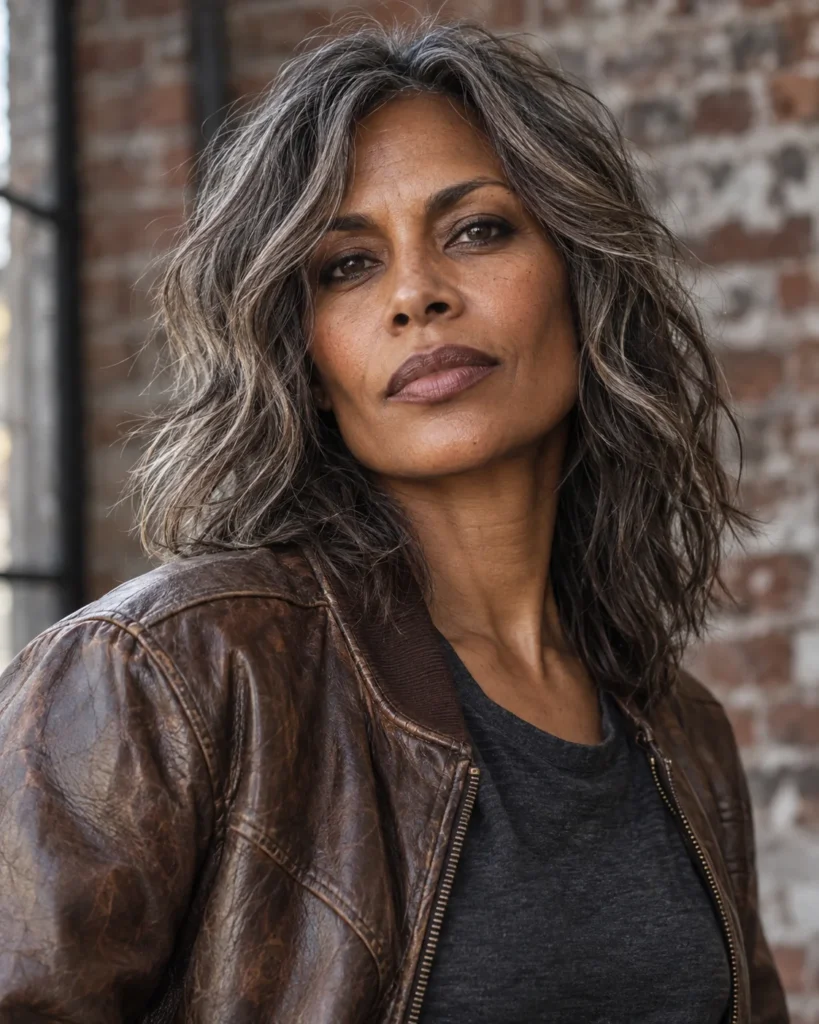
Shag-style framing with soft, irregular pieces around the face, but with the texturizing confined entirely to the front and the perimeter left solid.
A standard shag texturizes throughout and hollows fine hair out completely. Restricted to the front sections, the same technique gives you all the lived-in softness with none of the damage to your density.
- Best for: Natural fine waves, and anyone who wants a relaxed shape that air-dries well.
- Where the layers start: Cheekbone, with irregular point-cut lengths down to the jaw and below.
- Daily 5-minute styling: Scrunch mousse into damp hair, diffuse on low, then separate the front pieces with your fingertips.
- Skip it if: You like a polished finish, since this cut is built to look slightly undone.
12. The Side-Swept Framing Midi with Deep Part

A deep side part with framing carved to sweep diagonally across the face, one side noticeably longer than the other.
The deep part lifts the roots at the source, because the hair is forced to stand up as it travels across your head. The sweep then covers the temple area rather than exposing it, which is the opposite of what most framing does.
- Best for: Widening part lines, thinning temples, and flat roots that need lift without any product.
- Where the layers start: Cheekbone on the longer side, kept deliberately longer on the shorter side to preserve coverage.
- Daily 5-minute styling: Dry the roots at the part in the wrong direction first, then sweep the hair back over where it belongs.
- Skip it if: You switch your part often, because this shape commits to one direction.
13. The Classic U-Cut with Jawline Angle

The back is cut into a soft U shape with zero internal layering, and the front sections are angled to finish at the jaw.
Nothing is removed from the length at all. The U-shape perimeter stays fully intact while the jawline angle gives you the framing effect, which makes this the most density-protective cut on the list.
- Best for: Long fine hair, and anyone who has been genuinely burned by a previous layered cut.
- Where the layers start: Jaw level for the front angle, with no layering anywhere behind it.
- Daily 5-minute styling: Air-dry the length, then bend the two front pieces back with a flat iron in one pass each.
- Skip it if: You want volume at the crown, since this cut protects density but adds no lift.
What to Tell Your Stylist in the Chair
Hold up a photo if you like, but photos only show a finished result. These four sentences describe the mechanics that keep your density intact while you get there.
- Say this: “Please start my shortest framing piece at my cheekbone or lower, never at my temple.”
- Say this: “Keep my back and perimeter completely untouched, and don’t blend the framing through the back.”
- Say this: “Slide-cut with scissors, please. No razor and no thinning shears anywhere in my hair.”
- Say this: “Can you show me how to style these front pieces once, while I hold the brush myself?”
A stylist who nods at all four is one worth keeping. For more shapes built around low density, our haircuts for fine hair guides go into the rest of the cut.
Mistakes That Thin Out Hair vs. Techniques That Protect Density
| Face Framing Mistakes That Thin Out Hair | Techniques That Protect Density |
|---|---|
| The shortest piece starting up at the temple | The shortest piece starting at the cheekbone or chin |
| Framing blended through the back to help it flow | Framing carved at the front only, back left alone |
| A razor slicing the front sections | Scissors slide-cutting downward on dry hair |
| Thinning shears used to soften the ends | Point cutting for softness, ends untouched |
| Weight removed from the bottom two inches | A blunt, solid baseline holding the density |
| Sides thinned to make the front sit flatter | Sides left full so the front pieces have something to sit against |
| One flat sheet of hair down each side of the face | Two visible tiers that catch light separately |
Frequently Asked Questions
Will face-framing layers make fine hair look thinner from the front?
Only if the shortest piece starts too high. Framing that begins at the temple removes coverage from the sparsest part of your head, and you see the result straight on.
Starting at the cheekbone or chin does the opposite. The front pieces sit in front of your length rather than instead of it, so from the front you see two tiers of hair where there used to be one.
What length suits a round face with fine hair?
Somewhere between the jaw and just below it. That length adds vertical line to the face, which balances roundness, while pieces that stop at the cheekbone add width exactly where a round face already has it.
A bottleneck carve or a deep side sweep both work well here, since they create a diagonal rather than a horizontal across the widest part of your face.
How do I stop framing pieces hanging flat against my cheeks?
Direction, not product. Dry those pieces back and away from your face rather than letting them fall forward, then let them cool in that position before you release them.
Hair that touches your skin picks up warmth and oil and goes limp within an hour, while hair that stands slightly away keeps its shape. A light mousse at the front roots before drying helps, and our volume and thickness guides cover the rest of the lift question.
Can I have face framing with a cowlick at my hairline?
Yes, but the cut has to work with the cowlick rather than against it. Tell your stylist where it is before they start, because a framing piece cut across a cowlick will lift and separate no matter how you dry it.
The usual solution is leaving that section slightly longer, so its own weight holds it down, and parting your hair to the side the cowlick naturally wants to go.
Face framing is the least risky change you can make to fine hair, as long as it is treated as a carve at the front rather than a licence to layer. Nothing behind your ears needs to change at all.
Ask for the landing point you want, protect your perimeter, and give one cut a full growing-out cycle before you decide. If you are over fifty, our hairstyles over 50 section has more shapes built for changing density.
Pick your landing point, protect your perimeter, and take the four talking points into the chair with you.