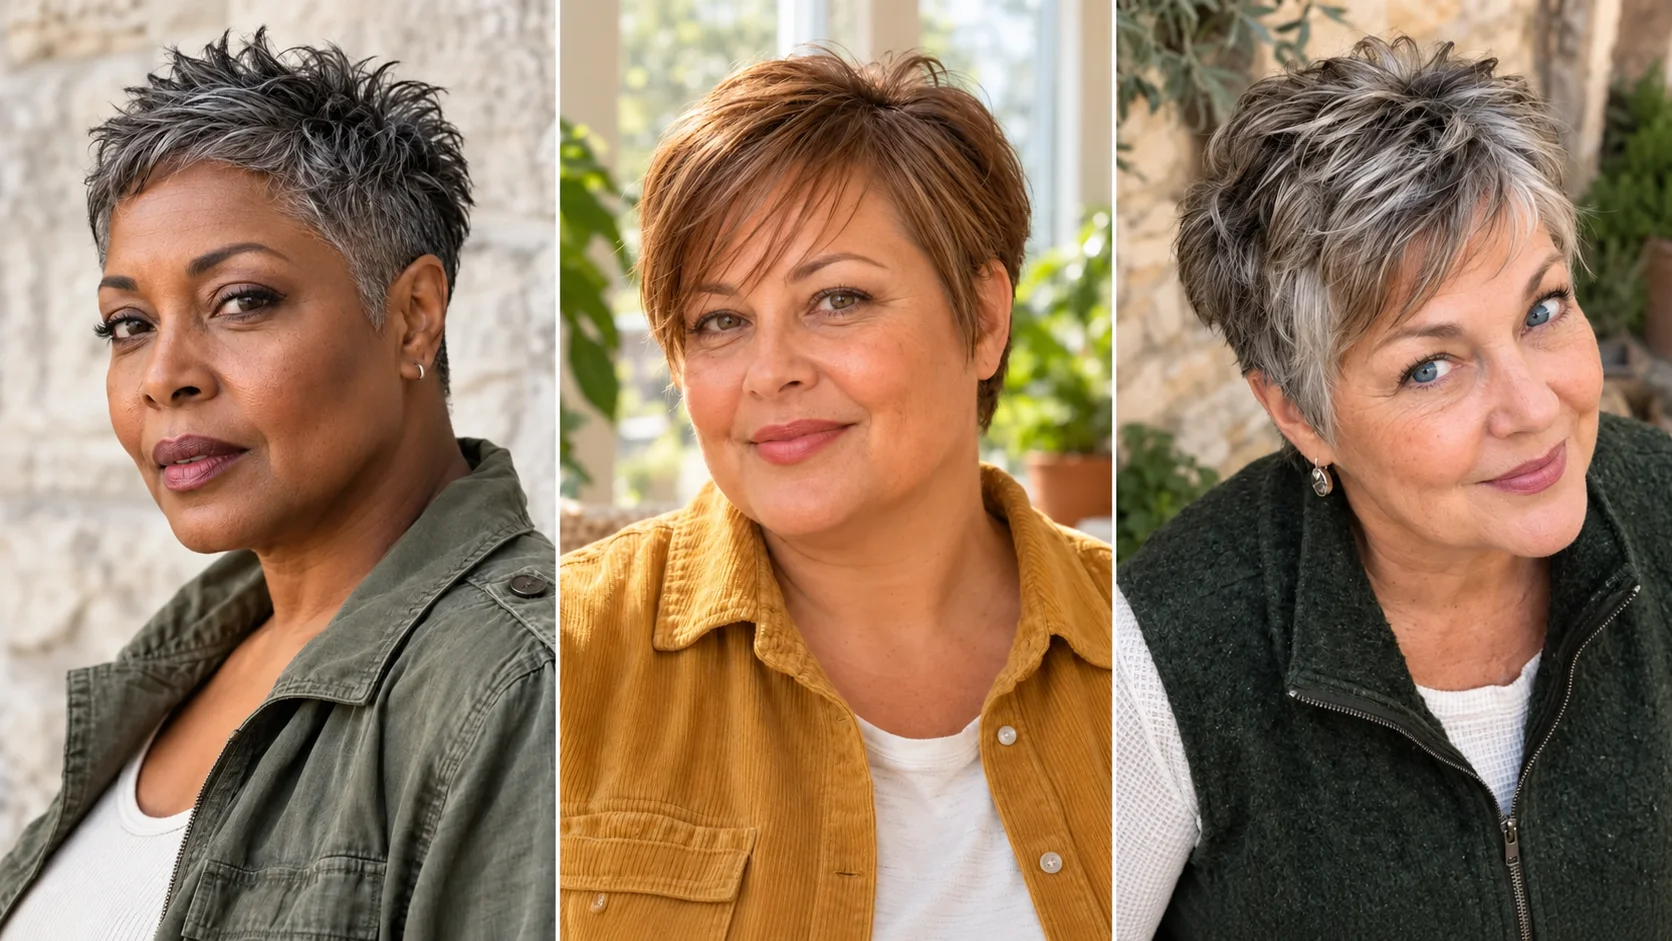
Pixie Cut for Thin Hair and Round Face: 12 Cuts That Add Height
Two things stop women with round faces and fine hair from booking the pixie they secretly want. One is the fear of looking wider, with hair puffing out over the ears and cheeks that suddenly have nowhere to hide. The other is the fear of looking barer, with a scalp showing through hair that was already thin before someone cut four inches off it.
Both fears come from the same mistake, and it is a mistake of direction rather than length. When volume sits at the sides, level with your cheeks, it adds width to the widest part of your face. When it sits at the crown, it adds height instead, and height is what a round face is short of.
The second fear is the one I’d like to put to rest properly. Fine hair usually performs better short, not worse. Length is weight, and weight pulls roots flat against the scalp. Take the weight away and those same roots stand upright, which puts a layer of air under your hair where there used to be none.
So the geometry you want is specific: vertical lift on top, flat and close at the temples, a diagonal somewhere across the face, and a nape cut close enough to lengthen your neck. Get those four right and a pixie will slim your features rather than round them.
The Three Golden Rules of a Round-Face Pixie
Rule One: Height on Top, Flat at the Temples
Width at the ears is the single most common reason a pixie goes wrong on a round face. Hair sitting out at that level widens the exact horizontal plane your face is already widest at, and the result is the basketball shape everyone dreads.
Tapering the sides close removes that width entirely, and it does something else too. A flat side makes the crown look taller by comparison, so you get height for free without adding a single strand.
This is where the fine-hair advantage kicks in. Thin sides lie flat easily, which is the exact behavior you want, while thick hair often has to be thinned out to achieve the same thing.
Rule Two: Cut a Diagonal Somewhere
A round face is built on circles and horizontals, so anything else you introduce breaks the pattern. A straight fringe cut across your brow adds one more horizontal line, and that reinforces the roundness rather than interrupting it.
A diagonal does the opposite. A deep side part, a side-swept fringe, or an asymmetrical length all draw a line that travels up and across your face, which the eye follows instead of tracing your outline.
You only need one diagonal. Two or three competing angles start to look busy, especially on short hair where there isn’t much surface area to work with.
Rule Three: Taper the Nape
The nape is the part of your cut you never see and everyone else does. Cut blunt and straight across, it creates a hard horizontal at the base of your head, which visually shortens your neck and squares off the whole shape.
Graduated and tapered, it follows the natural curve where your neck meets your skull. That continuous line elongates the neck, and a longer-looking neck sharpens the jawline sitting above it.
Ask for this by name, because plenty of stylists default to a clean straight line at the nape since it looks tidier in the chair. It photographs worse and it ages the whole cut.
12 Pixie Cuts for Thin Hair and Round Faces
Every cut below builds height rather than width, and each one uses a different tool to do it. Read the round-face reasoning under each, because that is what tells you which one fits your face rather than just your taste.
1. The Asymmetrical Pixie with Deep Side Part
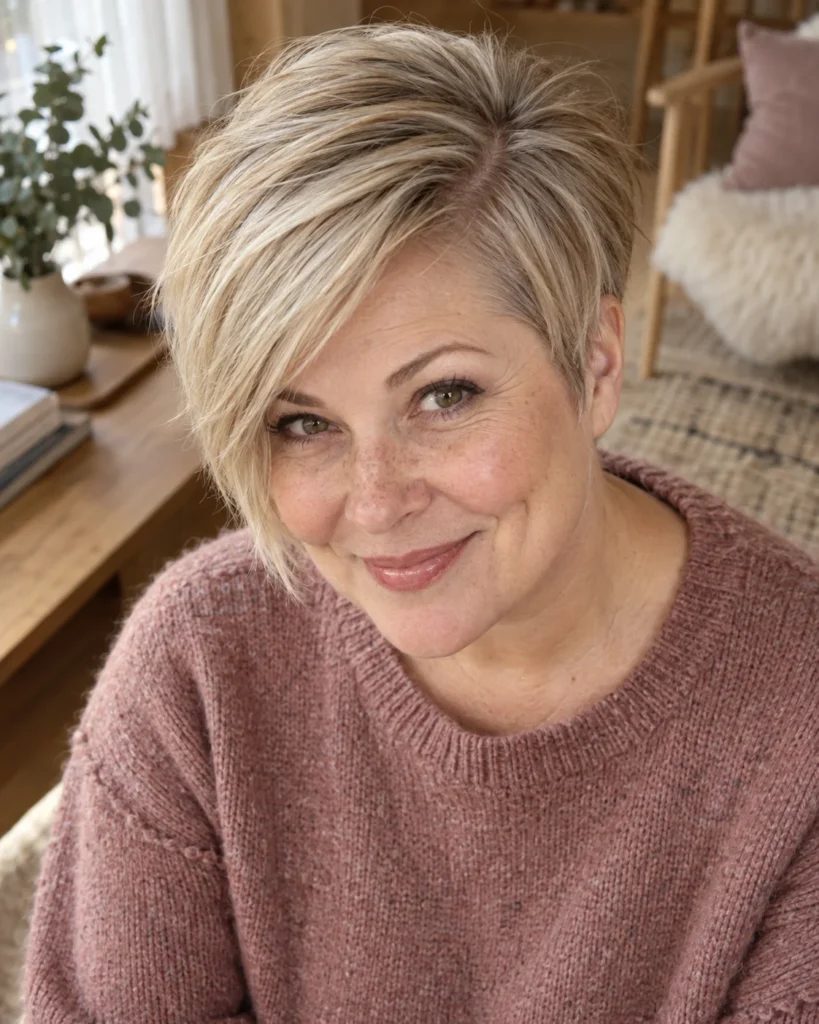
One side left noticeably longer than the other, with a part set far over toward the temple so the weight sweeps across the top of the head.
If you only try one cut from this list, make it this one. The deep part builds root lift at the source because the hair has to stand up to travel across, and the length difference creates a strong diagonal across your face.
- Best for: Round faces with fine hair, flat crowns, and anyone who wants maximum effect from minimum styling.
- Why it works on round faces: The diagonal sweep breaks the circular outline, and the volume sits on top rather than at the cheeks.
- Daily 5-minute styling: Dry the roots at the part in the opposite direction first, then sweep the hair back over where it belongs.
- Skip it if: You change your part regularly, because this shape commits to one side.
2. The Textured Crown Pixie with Tapered Sides
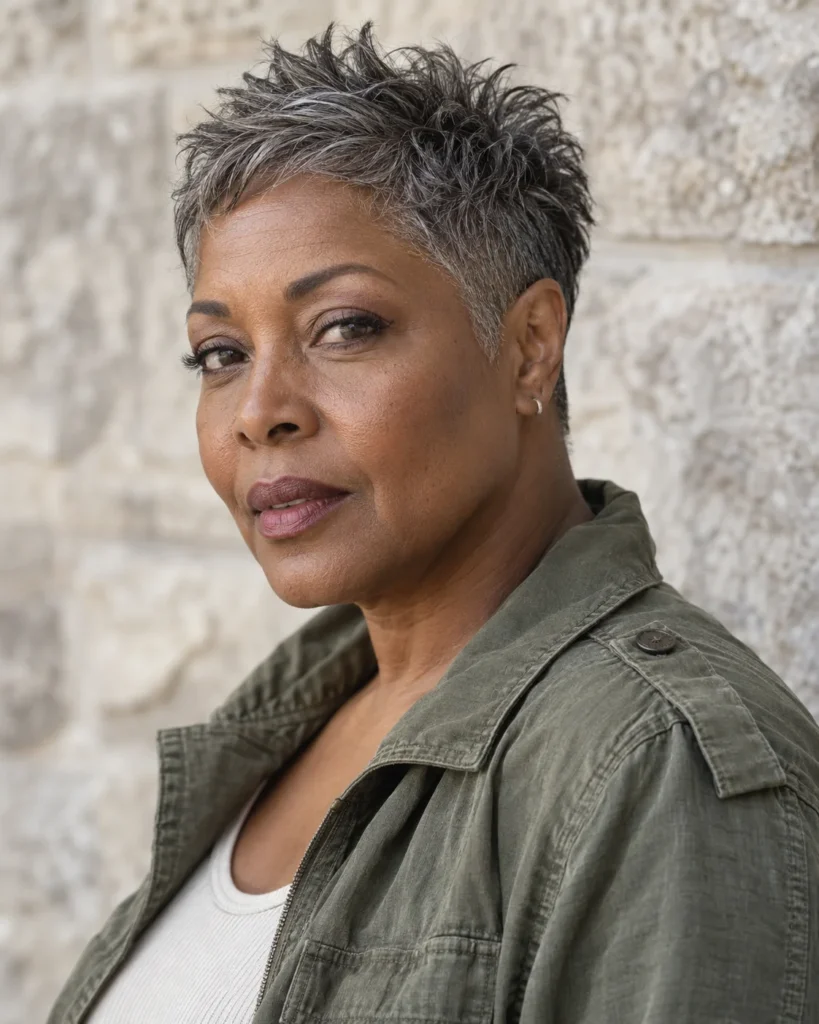
Short, texturized layers concentrated through the crown with the sides tapered close against the head.
This is the purest version of the height-versus-width principle. All the visual interest sits at the top of your head, and the sides are treated as a clean backdrop rather than something to be styled.
- Best for: Thinning at the crown, widening part lines, and anyone whose current cut puffs out at the sides.
- Why it works on round faces: Flat temples narrow the widest plane of the face while crown texture adds the vertical the face lacks.
- Daily 5-minute styling: Root spray at the crown, rough-dry upward with your fingers, then smooth the sides down with damp palms.
- Skip it if: You can’t visit the salon every five or six weeks, since the tapered sides grow out quickly.
3. The Soft Curved Bixie

Part pixie, part bob. Short crown layers with the front pieces kept longer, falling toward the jaw.
For round faces this is the gentle entry point. Those longer front pieces travel down past your cheeks toward the jaw, which pulls the eye vertically and covers the widest part of your face at the same time.
- Best for: Anyone nervous about going fully short, and round faces that need some length near the jaw.
- Why it works on round faces: The front length creates vertical line down the sides of the face instead of width across it.
- Daily 5-minute styling: Rough-dry upside down, push the crown up, then pull the front pieces forward and slightly down.
- Skip it if: You want one uniform length, since this cut lives on the contrast between crown and front.
4. The Spiky Textured Pixie

Short throughout with heavily texturized pieces on top, worn with matte paste so the pieces separate and stand rather than clump.
Spiky sounds harsh, but the modern version is simply height with definition. On fine hair it works particularly well, because separated pieces read as more hair than a smooth sheet of the same amount does.
- Best for: Very fine hair with little natural body, strong features, and anyone who likes a bit of edge.
- Why it works on round faces: Maximum vertical lift with nothing at all happening at ear level.
- Daily 5-minute styling: Matte paste warmed between dry palms and pushed up through the top. Skip shiny gels, which weigh fine hair down.
- Skip it if: You want soft and romantic, or you dislike frequent trims.
5. The Side-Swept Pixie with Wispy Bangs
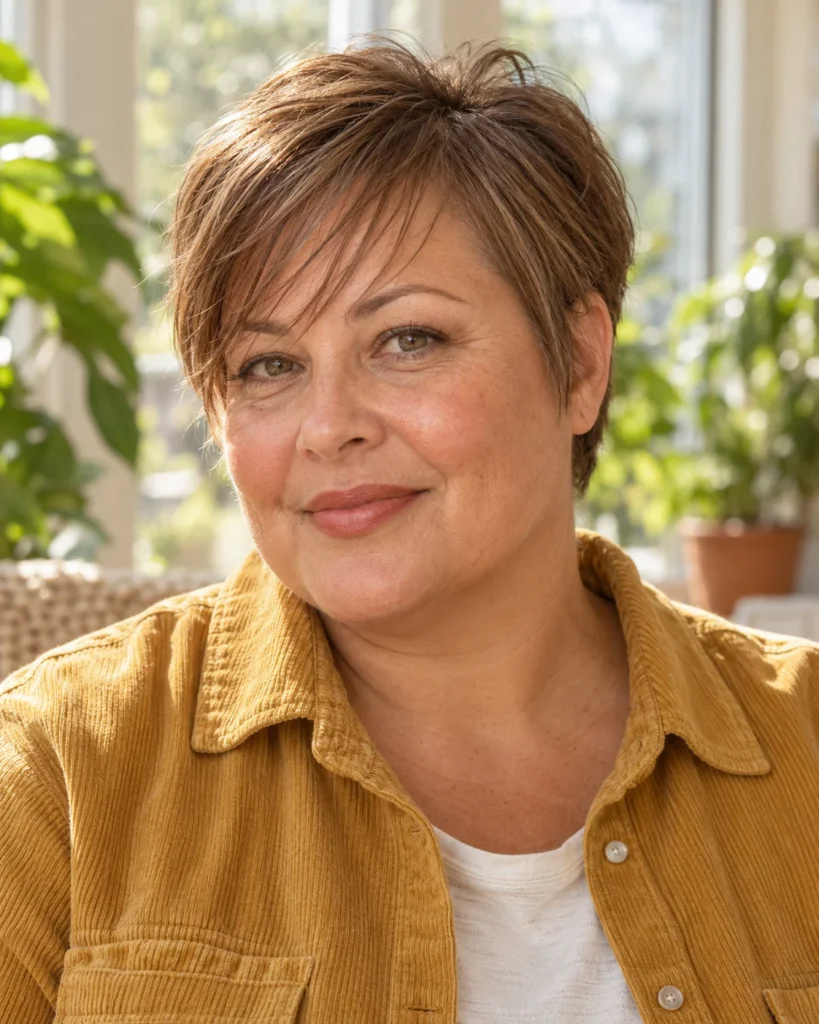
A classic short pixie paired with a fine, airy fringe swept diagonally across the forehead rather than cut straight.
The sweep is the whole point. It carries the eye from one side of your forehead to the other on an angle, which is the simplest way to interrupt a round outline without changing your length at all.
- Best for: Higher foreheads, softening forehead lines, and anyone who wants a fringe without heaviness.
- Why it works on round faces: A diagonal fringe replaces the horizontal line a blunt fringe would draw across the widest point.
- Daily 5-minute styling: Dry the fringe across on the diagonal with a flat brush, then set it with a light mist of hairspray.
- Skip it if: Your density is low everywhere, because even a wispy fringe takes hair from somewhere.
6. The Tapered Pixie with Blended Sideburns
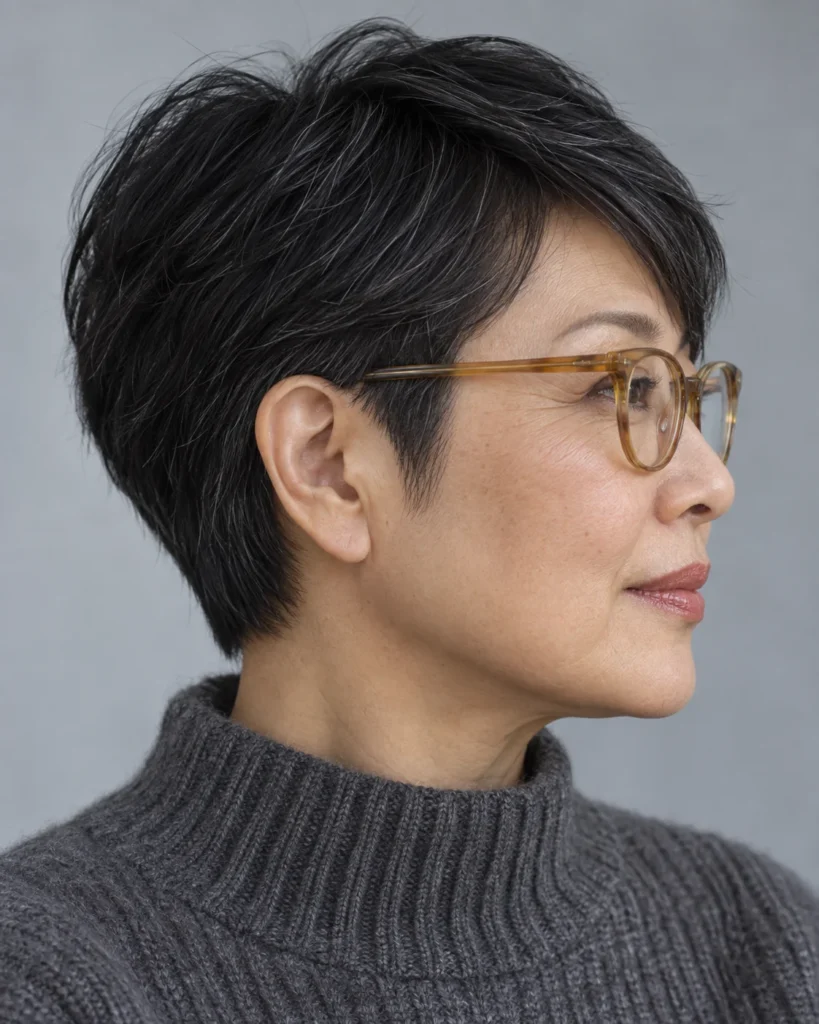
Short all over with the sideburn and temple area feathered and blended close, so nothing sits under the arms of your glasses.
Anyone who wears glasses daily knows the little wing of hair that sticks out over the frames. This cut removes it by design rather than by fighting it every morning.
- Best for: Daily glasses wearers, and round faces that need the temples kept as narrow as possible.
- Why it works on round faces: Tapered temples pull width out of the widest plane, and glasses add their own horizontal so the hair mustn’t.
- Daily 5-minute styling: Smooth the sides down with damp palms while drying the top upward. That contrast is the entire look.
- Skip it if: You wear glasses only occasionally, since you have more freedom at the temples than this cut assumes.
7. The Salt-and-Pepper Choppy Pixie

Choppy, uneven layers cut through a natural mix of grey and darker hair, so the two tones sit at different depths.
This is a density trick as much as a shape. Strands of different colors at different lengths create shadow and dimension, and the eye reads that as fullness rather than as scalp.
- Best for: Natural salt-and-pepper hair, and low density anywhere through the top.
- Why it works on round faces: Choppy irregular lengths break the smooth circular silhouette a uniform crop would create.
- Daily 5-minute styling: Texture spray at the roots, then scrunch with your fingers so the pieces separate and both tones show.
- Skip it if: You color all over to one single shade, since this cut needs two tones to work with.
8. The Soft Feathered Pixie with Elongated Nape
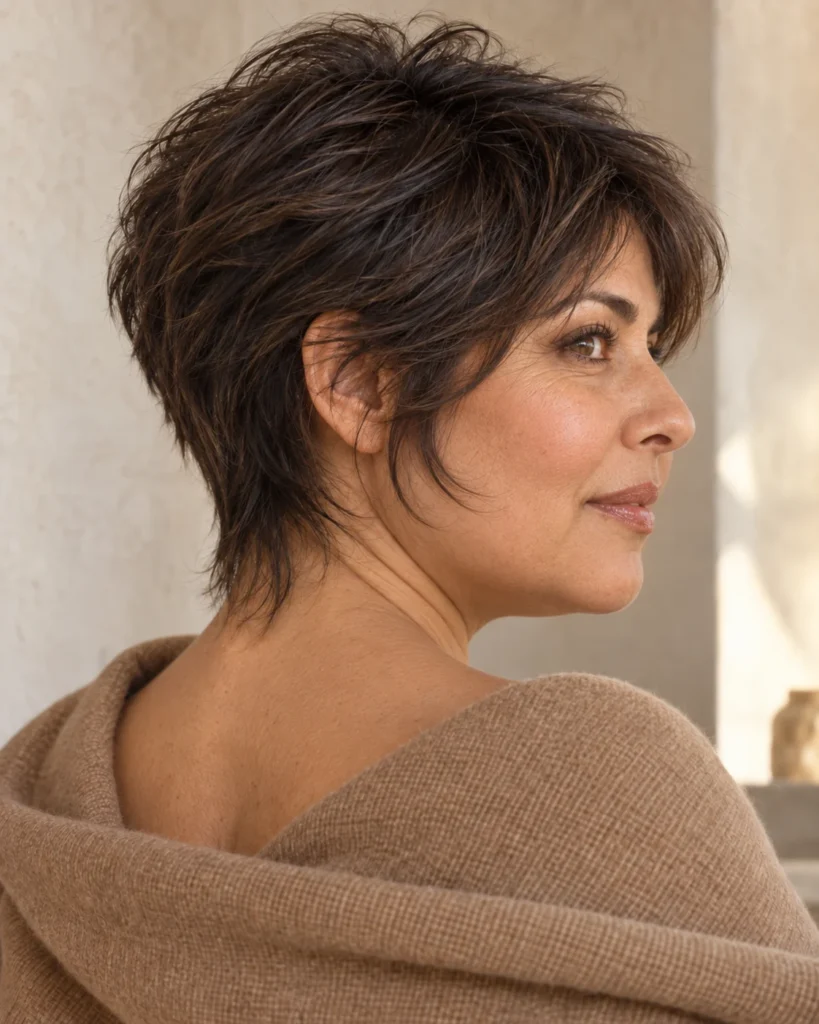
Soft feathered pieces on top with the nape graduated long and close, following the curve of the neck downward.
The elongated nape is doing quiet work that nobody talks about. It extends the visual line of your head down into your neck, and that extra length is exactly what a round face and a soft jawline both benefit from.
- Best for: Softening a round jaw, shorter necks, and anyone who wants elegance over edge.
- Why it works on round faces: A long tapered nape stretches the silhouette vertically where a blunt nape would cut it off square.
- Daily 5-minute styling: Light cream through the top only, then smooth the nape down flat with your fingers.
- Skip it if: You need a trim schedule you can stretch, since the nape shape is the first thing to grow out.
9. The Brushed-Back Pompadour Pixie
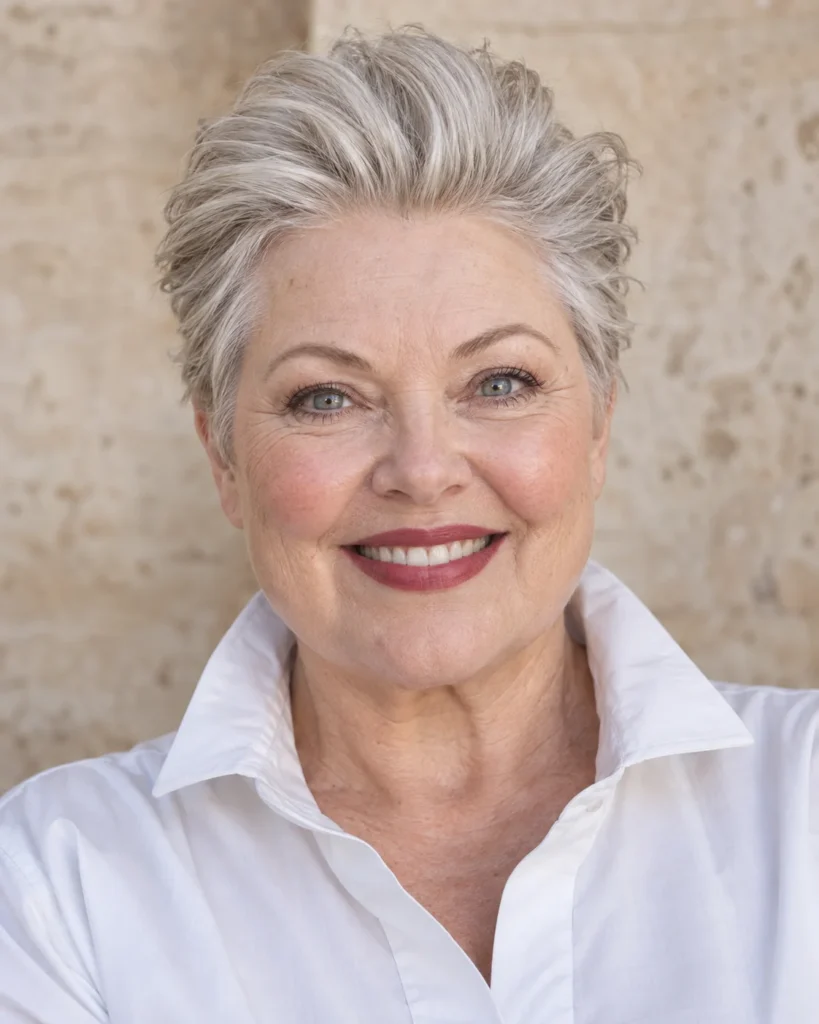
Length kept on top and swept up and back from the forehead, with the height built at the front hairline rather than the crown.
This creates the most vertical line of any cut here. All the lift sits directly above your face, which is the most efficient possible place to put it when you want to lengthen a round shape.
- Best for: Round faces that need serious vertical, and anyone comfortable with a fully open forehead.
- Why it works on round faces: Height directly above the face adds length to the whole silhouette from the front.
- Daily 5-minute styling: Blow-dry backward on a vent brush, lifting at the front hairline, then set with a light spray.
- Skip it if: You rely on a fringe to soften your forehead, since this cut removes that option entirely.
10. The Soft Disconnected Undercut Pixie
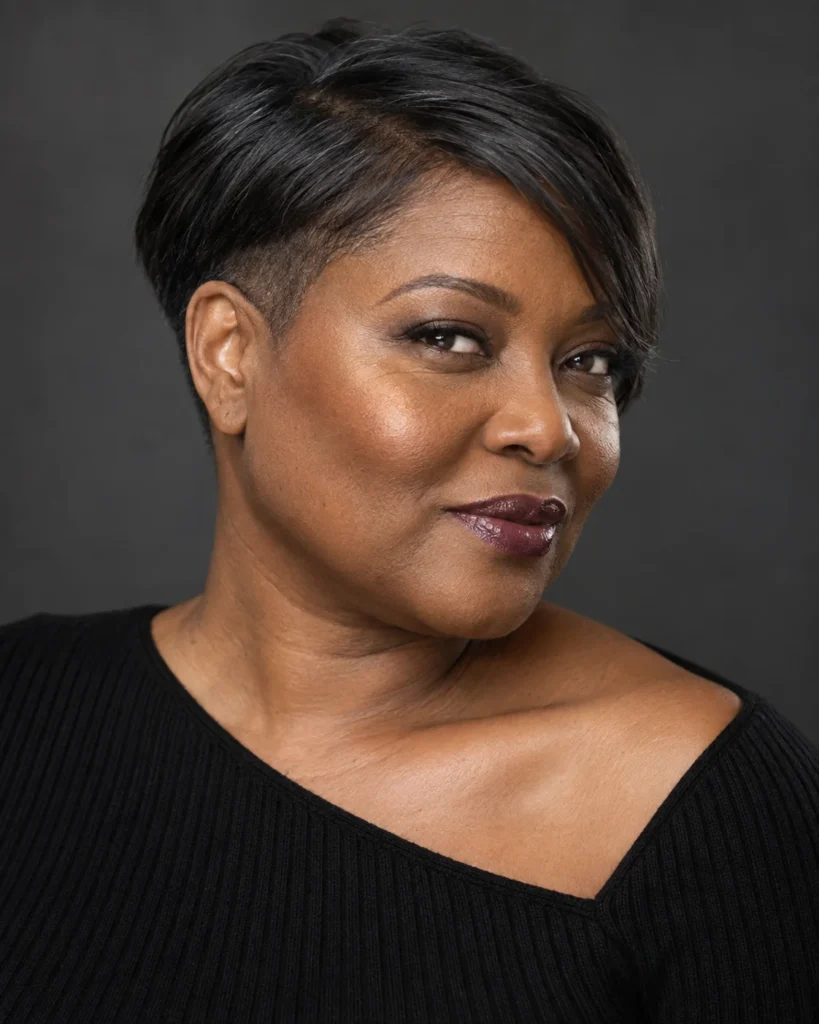
The hair underneath at the sides and nape is cut very close, with the top layer left longer and falling over it.
On fine hair this is an unexpectedly good trick. Removing the bulk underneath means the top layer has nothing to sit on, so it lies smooth and close instead of puffing outward at the ears.
- Best for: Fine hair that still manages to puff at the sides, and round faces needing the closest possible temples.
- Why it works on round faces: It removes width at ear level more completely than any other cut here.
- Daily 5-minute styling: Dry the top layer forward and down over the shorter section, then lift only at the crown.
- Skip it if: You want to grow your hair out soon, because the disconnected section takes a long time to blend back in.
11. The Wispy Curtain Fringe Pixie

A pixie with a soft fringe that parts near the middle and sweeps outward on both sides, falling to around cheekbone level.
The curtain creates two gentle diagonals instead of one, framing your eyes and drawing attention to the center of your face rather than its outline.
- Best for: Anyone who wants a fringe with more presence than a wisp, and glasses wearers, since it clears the rims.
- Why it works on round faces: Two outward diagonals pull the eye away from the cheeks toward the middle of the face.
- Daily 5-minute styling: Dry the fringe back and away from your face first, then let it fall into the center part.
- Skip it if: Your face is round and short rather than round and full, since a near-middle part can add width.
12. The Micro-Pixie with Soft Feathered Edges
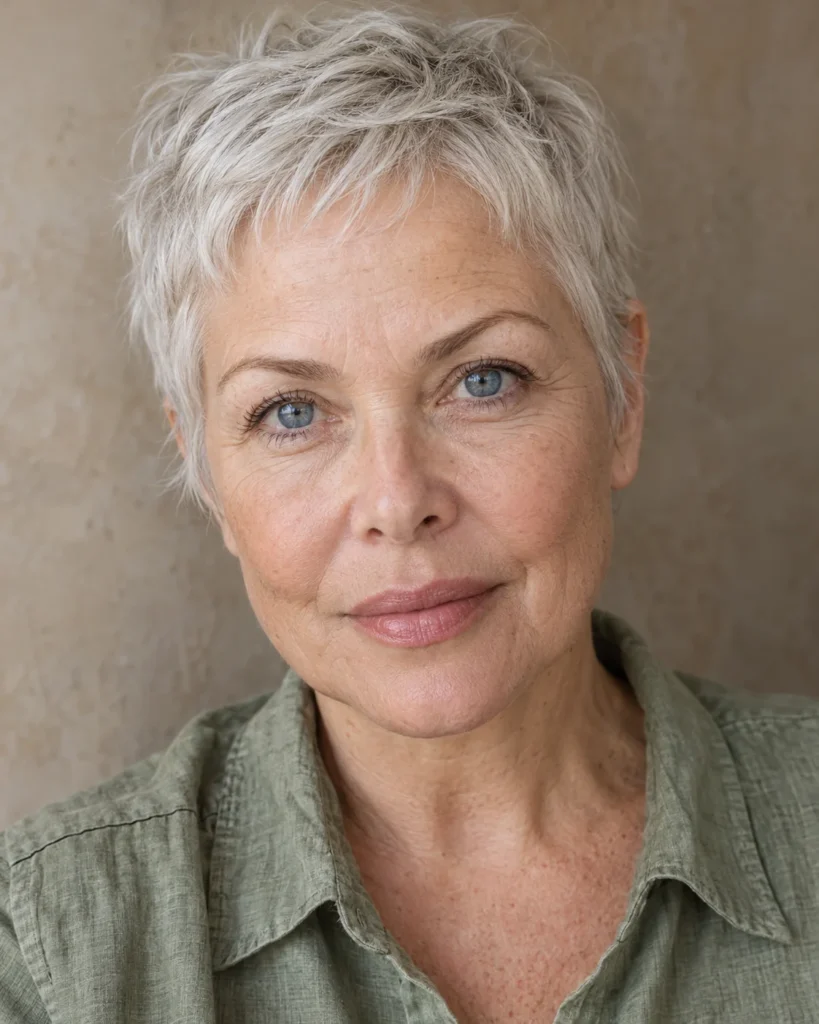
The shortest cut here, close all over, but with the hairline, ears and nape feathered rather than cut in sharp lines.
Those soft edges are what keep it warm rather than severe. On a round face, the closeness at the sides does the slimming, and the feathering stops the overall shape from looking like a helmet.
- Best for: Truly wash-and-wear mornings, very fine hair, and strong bone structure.
- Why it works on round faces: Nothing sits at ear level at all, so the face is read by its features rather than its width.
- Daily 5-minute styling: Towel-dry and go. A fingertip of light cream at the crown if you want a little definition.
- Skip it if: You are not ready for your full face to be on show, since this cut hides absolutely nothing.
What to Tell Your Stylist in the Chair
Bring a photo if it helps, but a photo shows an outcome. These four sentences describe the geometry that makes the outcome work on your face.
- Say this: “Please keep the sides and temples close and flat, and build all the volume at my crown.”
- Say this: “I’d like a diagonal somewhere, either a deep side part or a side-swept fringe, rather than anything cut straight across.”
- Say this: “Can you taper and graduate my nape instead of cutting a blunt line across it?”
- Say this: “Scissors and point cutting only, please, and no thinning shears on fine hair.”
The nape request is the one most often skipped, so say it even if the rest feels obvious. For more shapes built around low density, our haircuts for fine hair guides cover the longer options too.
Mistakes That Widen a Round Face vs. Techniques That Slim and Lift
| Mistakes That Widen a Round Face | Techniques That Slim and Lift |
|---|---|
| Volume sitting out over the ears | Height built at the crown with flat temples |
| A blunt fringe cut straight across the brow | A side-swept or curtain fringe cut on a diagonal |
| A boxy, blunt line across the nape | A graduated, tapered nape that follows the neck |
| A middle part echoing the face’s symmetry | A deep side part creating an asymmetric sweep |
| Uniform length all over the head | Longer on top, closer at the sides |
| Shiny gel that flattens fine hair to the scalp | Matte paste and dry texture spray that separate and lift |
| Hair curled or flicked outward at cheek level | Front pieces travelling downward past the cheeks |
Frequently Asked Questions
Will a pixie make a soft jawline or double chin more obvious?
A badly shaped one will, and a well-shaped one does the opposite. The difference is almost entirely in the nape and the front pieces.
A blunt nape cuts the silhouette off square at the jaw, which draws a hard line right where you don’t want one. A tapered nape extends that line down the neck instead, and front pieces angling toward the jaw give the eye a vertical to follow. Both make the lower face look longer and cleaner.
How do I stop crown volume falling flat by lunchtime?
Two things usually cause it. You are applying product to dry hair rather than damp, and you are skipping the cool shot at the end of your blow-dry.
Root spray or light mousse goes onto damp roots before drying, because that’s when it can build structure. Then finish with 30 seconds of cool air, since hair sets its shape as it cools and warm hair simply collapses. Our volume and thickness guides go through the rest of the routine.
Can I wear glasses with a pixie on a round face?
Yes, and glasses can actively help you. Angular or rectangular frames add straight lines to a round face, which is exactly what the shape benefits from.
The one request to make is temple blending, so the hair above your ears is tapered and the frame arms lie flat instead of pushing it outward. Keep your glasses on for the final dry check too.
Which products should I avoid on thin pixie hair?
Anything heavy or shiny. Wet-look gels, oils, serums and pomades all coat fine strands and pull them down against the scalp, which is the opposite of what a pixie needs.
Stay with light mousse or root spray on damp hair, and matte paste or dry texture spray on dry hair. Use less than you think, warm it between your palms first, and keep it at the crown rather than the roots at your temples.
A pixie is not a risk for fine hair, it’s usually a relief. Less weight means roots that stand up by themselves, and less length means less of the thin, stringy ends that gave the game away in the first place.
Pick the cut that matches your face rather than the one you liked on someone else, ask for height at the crown and closeness at the temples, and give it one growing-out cycle before you judge. Our hairstyles over 50 section has plenty more short shapes worth a look.
Height at the crown, flat at the temples, one diagonal across the face. Take those three and the talking points into the chair.