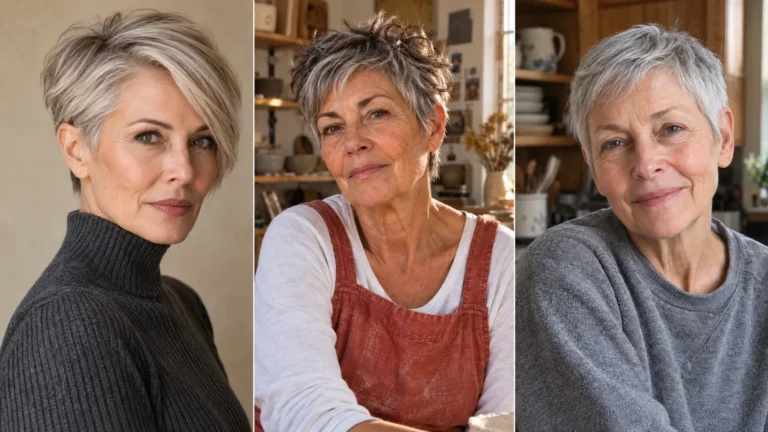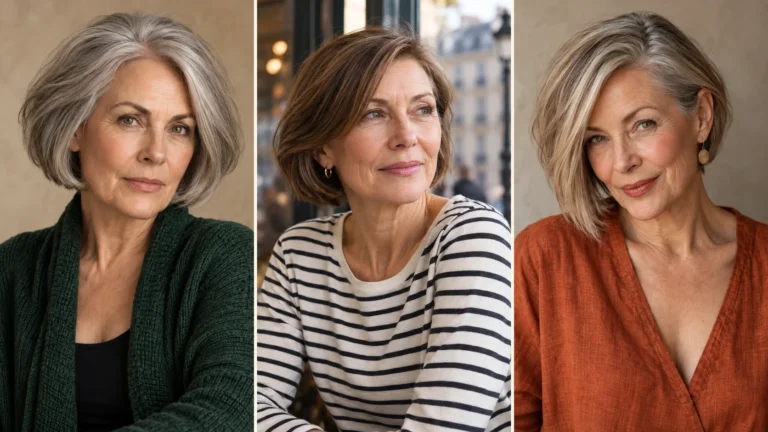
16 Hairstyles for Women Over 60 With Fine Hair That Fake Real Thickness
There’s a moment most women with fine hair remember. You catch yourself in a shop window, or in the back of a phone photo, and the hair that used to have some presence is lying flat against your head. The ends you can see straight through don’t help.
Here’s what nobody explains in the chair. Fine hair runs on a density budget, and every layer a stylist cuts spends some of it. If there aren’t enough strands to hold volume inside the shape, cutting more layers only makes the whole thing thinner.
The good news is that the right geometry does more than any product ever will. A blunt base, weight placed in the right spot, and a little lift at the crown can make fine hair look genuinely thick. These sixteen cuts are built exactly that way.
The Fine Hair Density Rules
- Blunt perimeter first. A solid bottom line is what reads as thickness from across a room. Hollowing layers through the ends is what makes fine hair look sparse.
- Scissors, not razors. Point-cutting with scissors softens the ends cleanly. A razor frays mature cuticles, and frayed ends split and frizz within weeks.
- Light moisture for gray hair. Silver strands are often coarser and thirstier than the hair they replaced. A light leave-in mist softens them without weighing down the roots.
- Use color for depth. A few warm lowlights or soft highlights create shadow between strands, and shadow reads as more hair.
16 Hairstyles for Women Over 60 With Fine Hair
Every cut below lists the density trick behind it. If you’re torn between two lengths, our face shape haircut finder matches cut length to your bone structure in a couple of minutes.
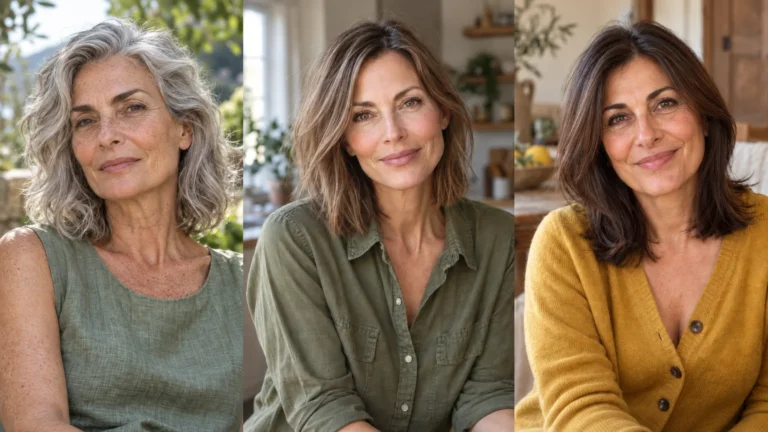
1. The Blunt Italian Collarbone Bob
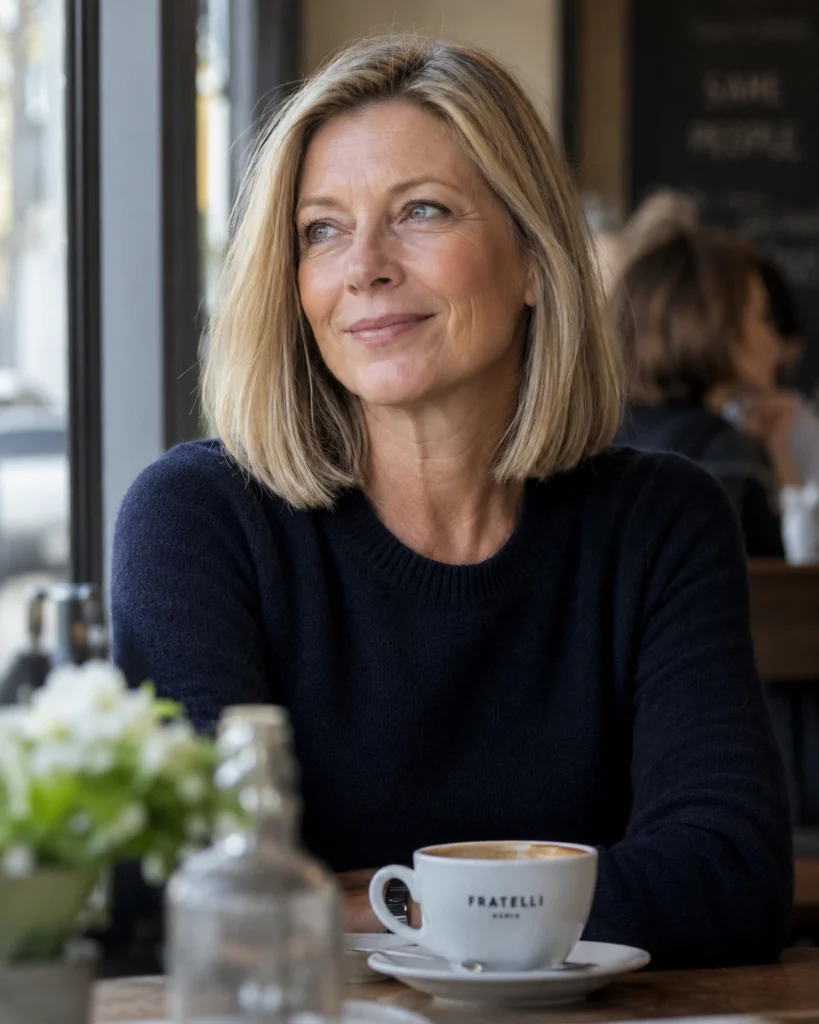
Look 01 • Everyday Classic
A single blunt line at the collarbone, with no layers cut into the ends at all.
Every strand finishes at the same point, so the bottom edge reads as one dense block of hair. It’s the most reliable way to make fine hair look full without changing anything about how you style it.
Best for: Thinning ends and straight fine hair
Density trick: One solid weight line at the collarbone
Morning styling: Five minutes with a paddle brush and cool air
2. The Textured Crown Pixie
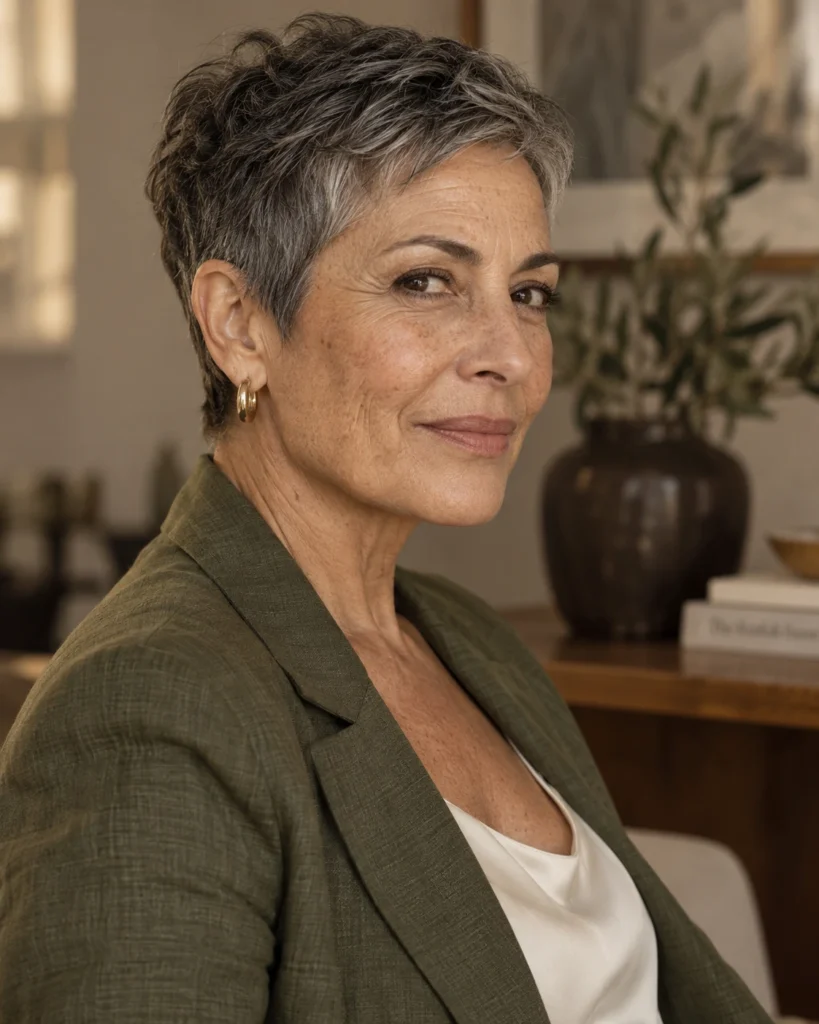
Look 02 • Instant Lift
Short, textured layers through the crown with the sides kept close.
The height on top pulls the eye upward, away from a softening jaw. Shorter hair also means less root gravity, so the roots can finally stand up on their own.
Best for: Flat crowns and widening parts
Density trick: Short crown layers that support each other
Morning styling: Two minutes of finger drying
3. The Soft Bixie with Wispy Bangs
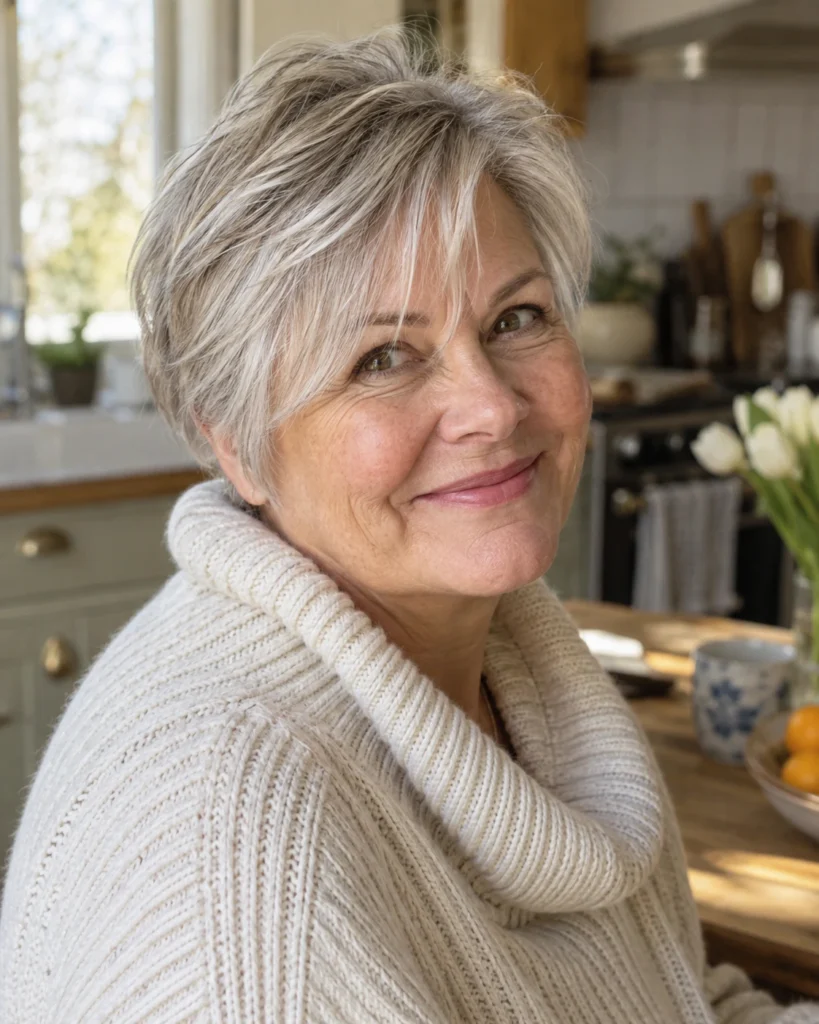
Look 03 • The Versatile One
Part pixie, part bob, with short crown layers and longer pieces at the front finished with a fine fringe.
It gives you lift on top and softness at the face in the same cut. For anyone nervous about going fully short, this is the gentlest step down.
Best for: Anyone easing toward shorter hair
Density trick: Crown height with a light, see-through fringe
Morning styling: Three minutes, pushing the crown up and the front forward
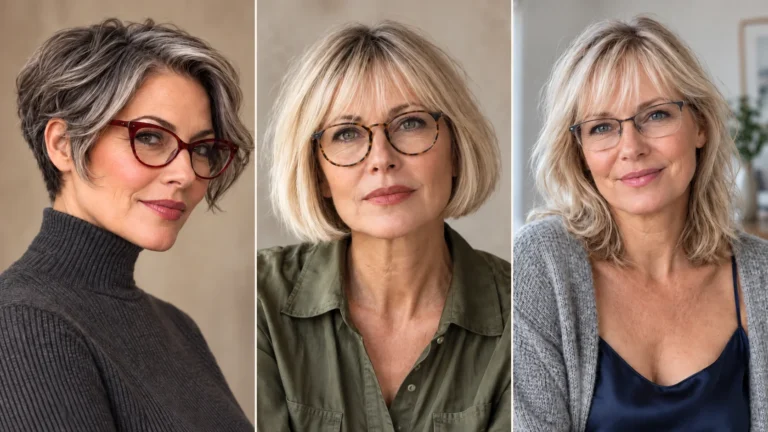
4. The French Chin-Length Micro-Bob
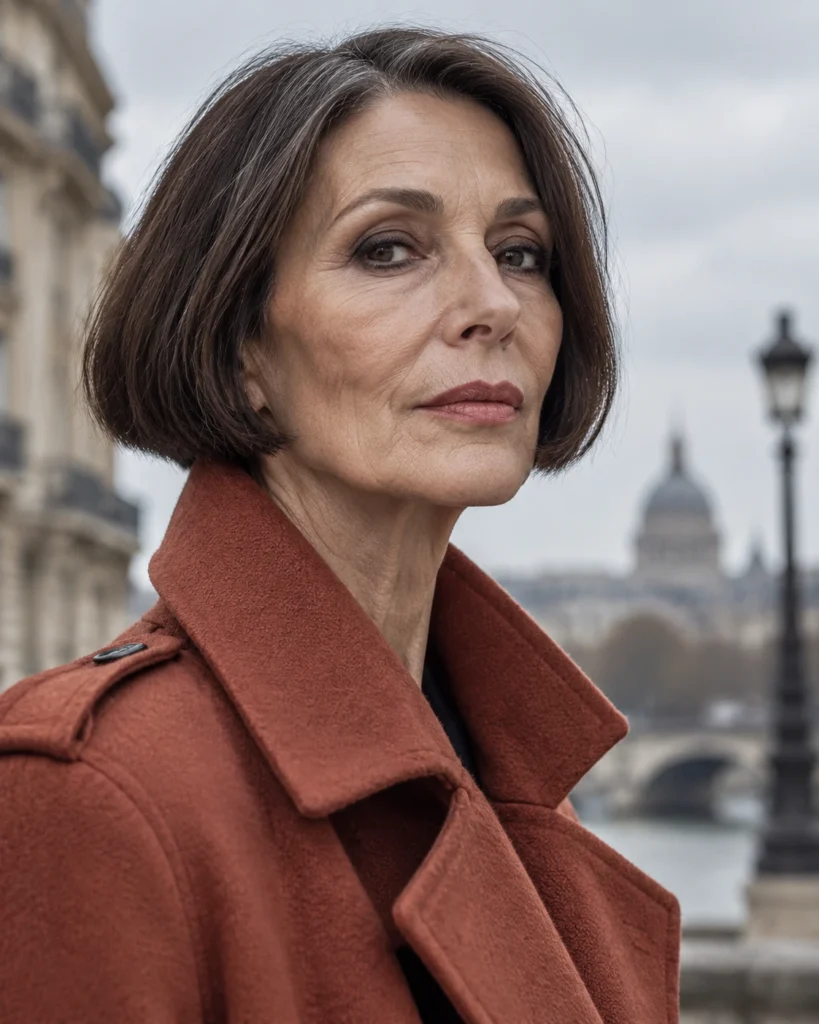
Look 04 • Perimeter Boost
A short, precise bob that lands right at the chin with a crisp edge.
The shorter the blunt line, the thicker it looks, because there’s less length for the hair to thin out over. It also frames the jaw cleanly, which is a bonus most women notice straight away.
Best for: Very fine hair and strong features
Density trick: A short, dense blunt edge
Morning styling: Three minutes with a round brush on the ends
5. The Asymmetrical Side-Part Crop
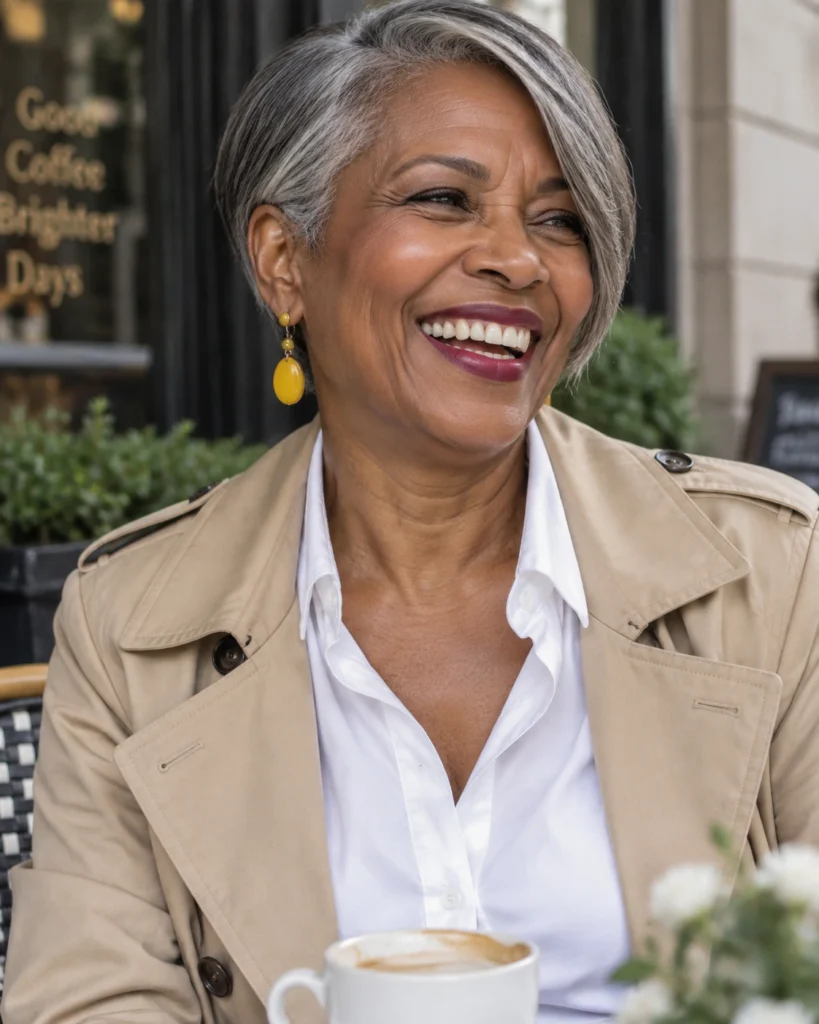
Look 05 • Covers a Thinning Part
A short crop with a deep side part and one side left noticeably longer.
The deep part forces the roots to stand up as they sweep across the head. The longer side then falls over the part line, which is usually where scalp shows first.
Best for: A widening or thinning part line
Density trick: Deep part that lifts and covers
Morning styling: Two minutes, drying the part the wrong way first
6. The Feathered Wedge with Soft Nape
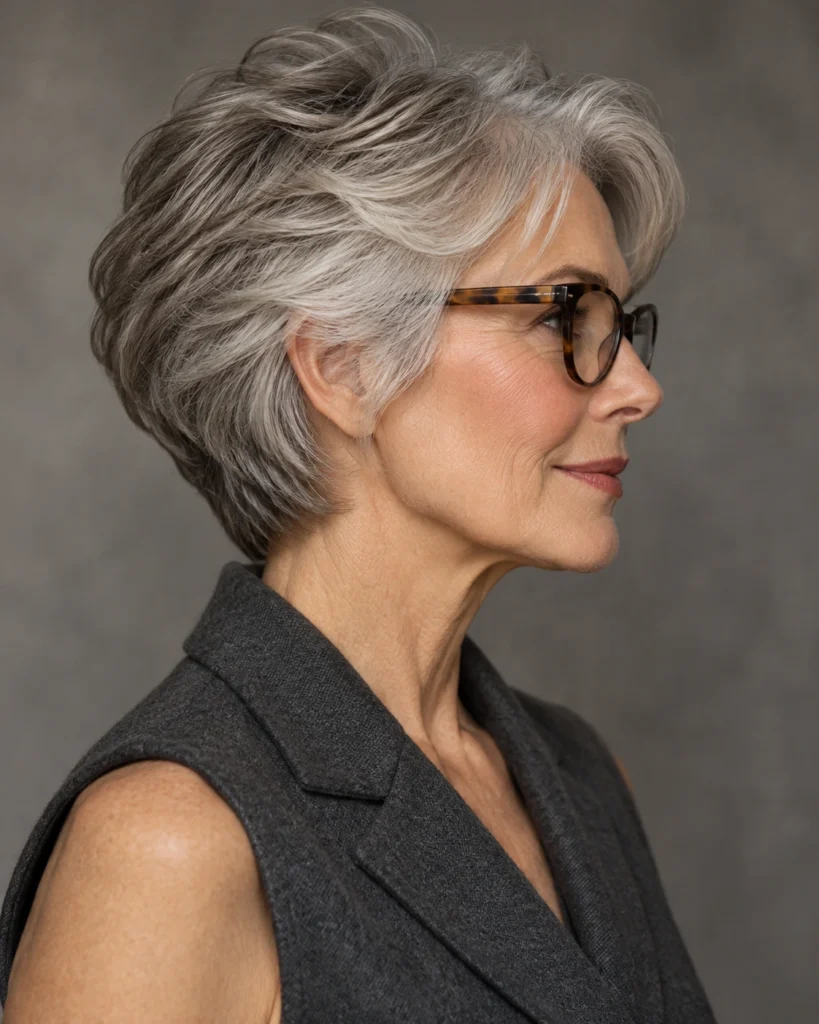
Look 06 • Lifts the Back
Weight built into a rounded curve at the back of the head, feathered on top and tapered softly at the nape.
Fine hair often exposes a flat spot at the back of the skull. The wedge rebuilds that curve so your profile looks fuller from the side.
Best for: Flat backs of the head
Density trick: Graduated weight that builds a rounded profile
Morning styling: Four minutes, lifting the back sections as you dry
7. The Wispy Shag Lob with Face-Framing Tendrils

Look 07 • Keeps Your Length
A lob with soft shag layers kept around the face and crown only, plus a few fine tendrils at the front.
The layering stays up top, so the density below the jaw is left alone. You get movement and lift without the see-through ends that full shags leave on fine hair.
Best for: Fine waves and anyone keeping some length
Density trick: Layers confined to the crown and face
Morning styling: Scrunch in mousse and air-dry
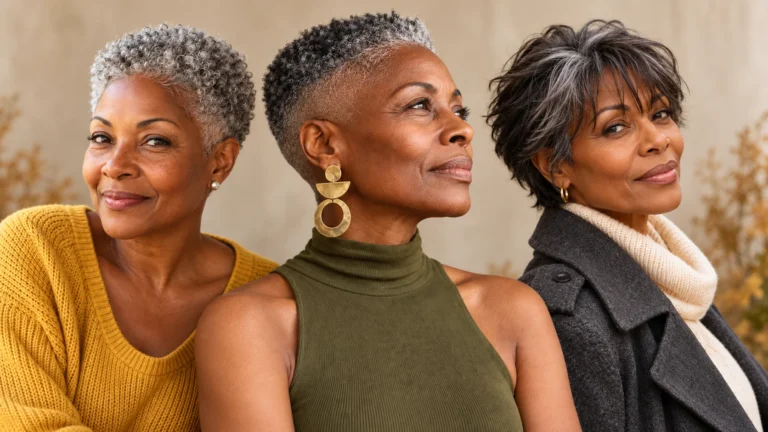
8. The Spiky Platinum Textured Crop

Look 08 • Hides Visible Scalp
A short, piecey crop worn with bright silver or platinum tones.
When hair color sits close to your scalp color, gaps between strands barely show. The spiky texture adds height and separation, which makes the whole head look fuller.
Best for: Natural silver and white hair
Density trick: Low contrast between hair and scalp
Morning styling: Two minutes with a little matte paste
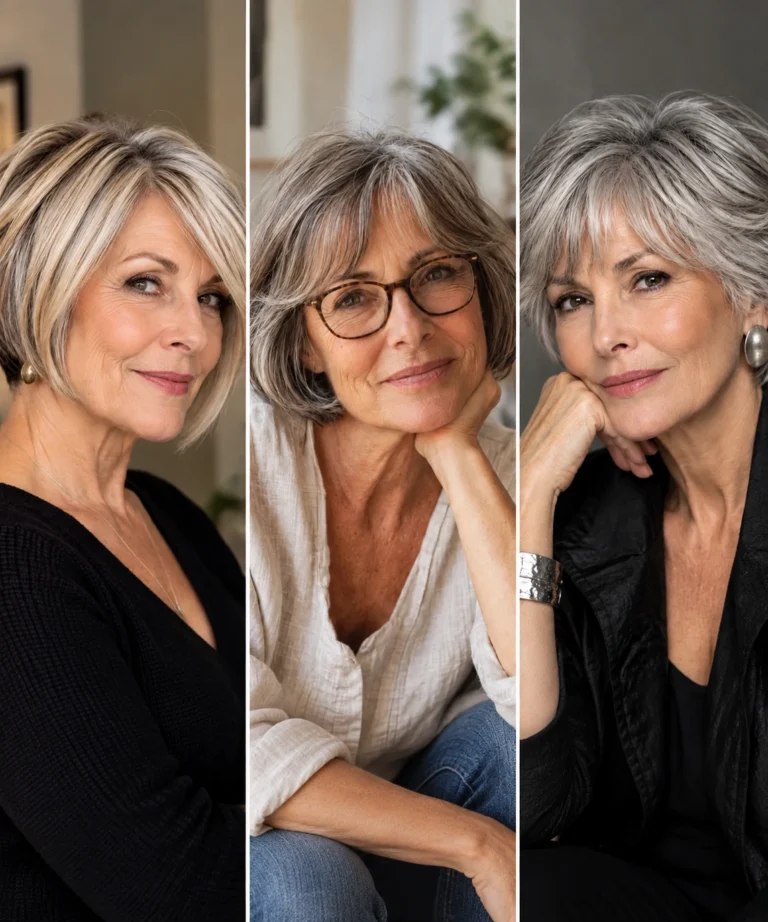
9. The Classic Tucked Bob with Side Fringe
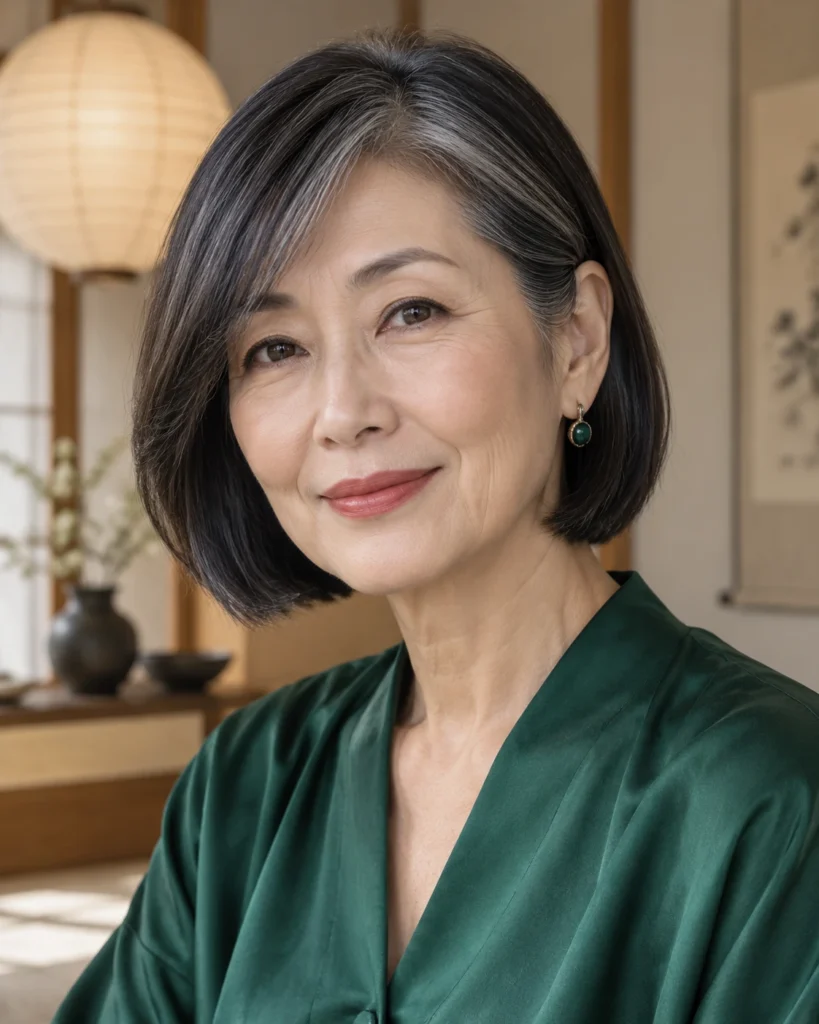
Look 09 • Sleek and Simple
A clean bob just below the jaw, worn tucked behind one ear with a soft side fringe.
Tucking one side gives you asymmetry with zero effort, and the smooth lines stay tidy even in dry, static-prone months. It’s quietly polished, the kind of cut that never looks overdone.
Best for: Low-effort mornings and straight hair
Density trick: Smooth surface that reflects light
Morning styling: Three minutes with a flat brush
10. The Graduated Stacked Bob
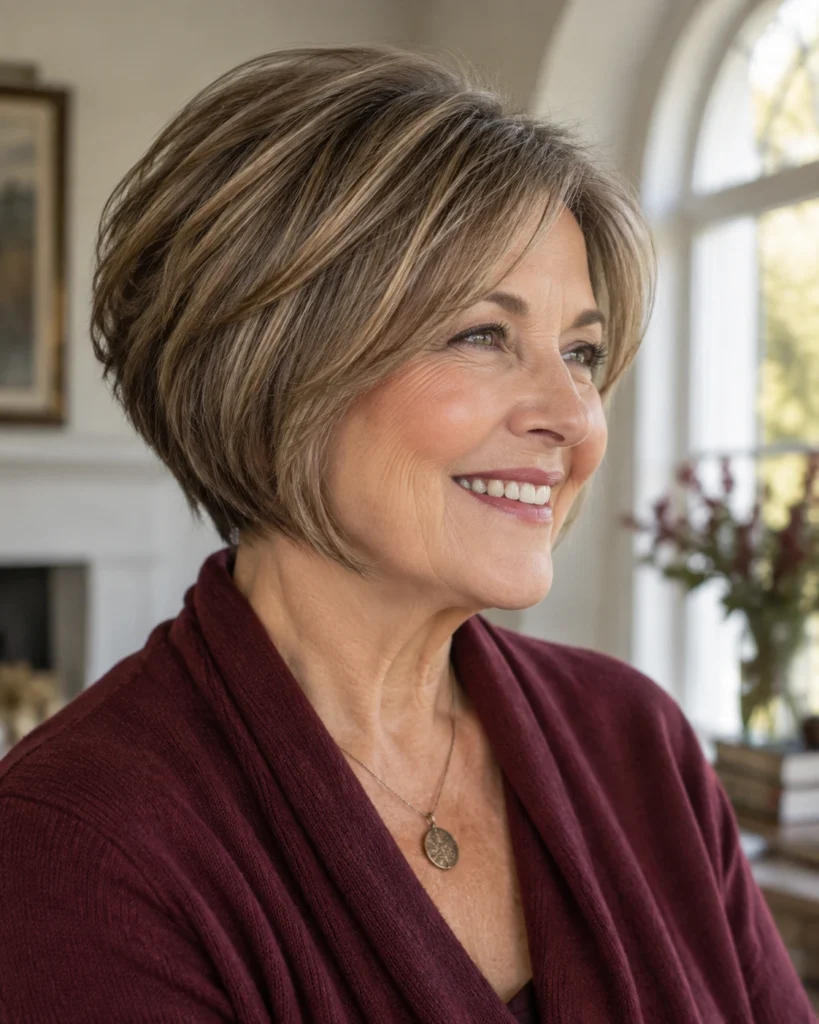
Look 10 • Built-In Height
Shorter and stacked at the back, angling longer toward the chin.
The stacking creates real structural height at the crown without any teasing. The forward angle also draws a line up toward your cheekbones.
Best for: Crowns that collapse by lunchtime
Density trick: Stacked layers that hold each other up
Morning styling: Four minutes, lifting the back straight up while drying
11. The Curly Lob with High Crown Layers
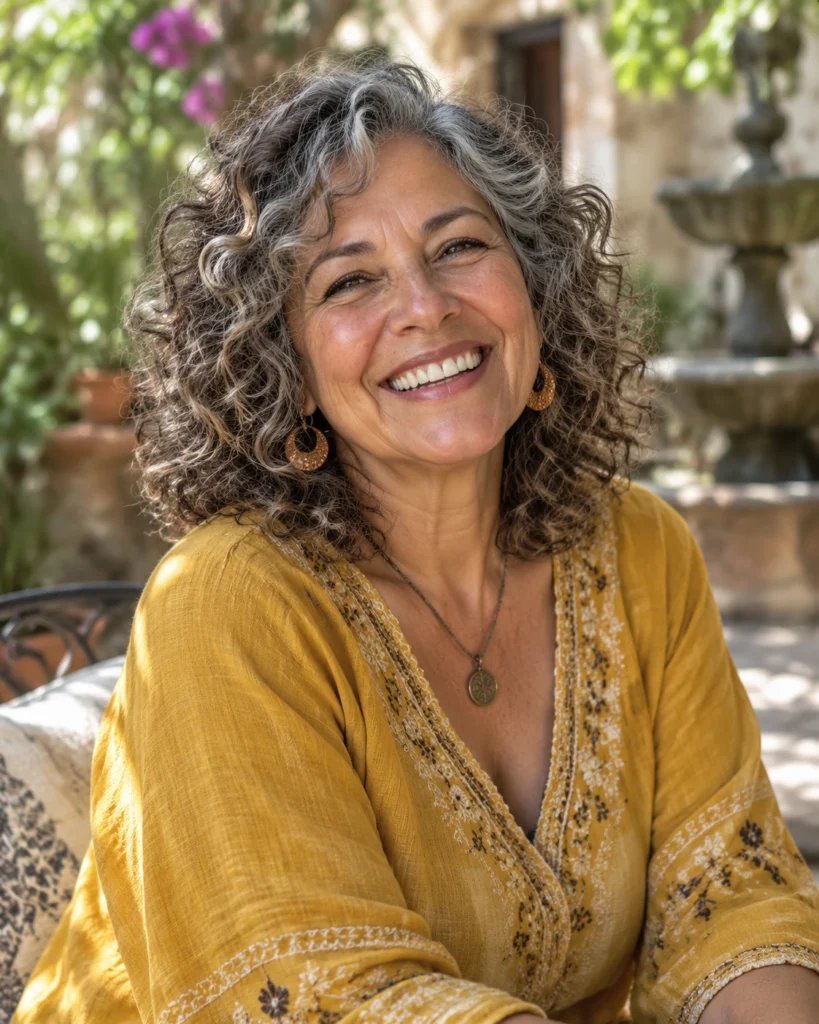
Look 11 • For Fine Curls
A curly lob with the layers cut high at the crown, leaving the ends fuller.
Fine curls cut in one length tend to fall flat on top and widen at the bottom into a pyramid. Moving the layers up spreads the volume evenly.
Best for: Fine natural curls and waves
Density trick: High layers that stop the pyramid shape
Morning styling: Define curls on damp hair and diffuse on low
12. The Brushed-Back Boyish Pixie
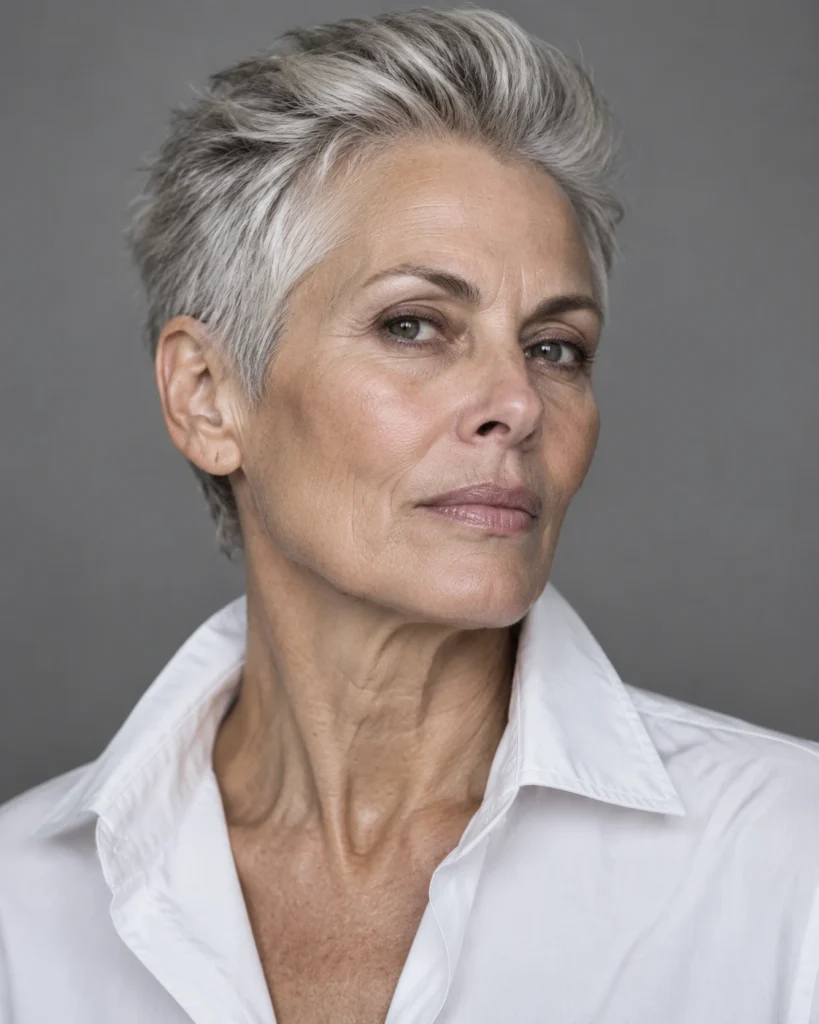
Look 12 • Opens the Face
A short pixie brushed up and back from the forehead, with enough length on top to hold the direction.
An open forehead lifts the whole face and shows off the eyes. There’s nothing sitting on your cheeks or brows to weigh the features down.
Best for: Strong features and open faces
Density trick: Lift at the front hairline
Morning styling: Three minutes with a vent brush
13. The Bottleneck Lob with Feathered Ends

Look 13 • Cheekbone Focus
A lob with a bottleneck fringe, narrow at the center and flaring out toward the cheekbones, plus softly feathered ends.
The fringe shape draws the eye to the cheekbones, and it costs very little hair to cut. The feathering stays at the very tips so the length still reads as dense.
Best for: Round faces and higher foreheads
Density trick: Narrow fringe that uses very little density
Morning styling: Four minutes, drying the fringe out to the sides
14. The Soft Layered Shoulder Cut with Curtain Fringe

Look 14 • Length Without the Gaps
Shoulder-length hair with soft layers starting at the cheekbone and a curtain fringe parting at the center.
Starting the layers low keeps the temples and sides covered. The perimeter stays solid, so you avoid the see-through edges long fine hair usually gets.
Best for: Women who love their length
Density trick: Low-starting layers and a solid perimeter
Morning styling: Five minutes, round-brushing the fringe back and away
15. The Salt-and-Pepper Choppy Crop
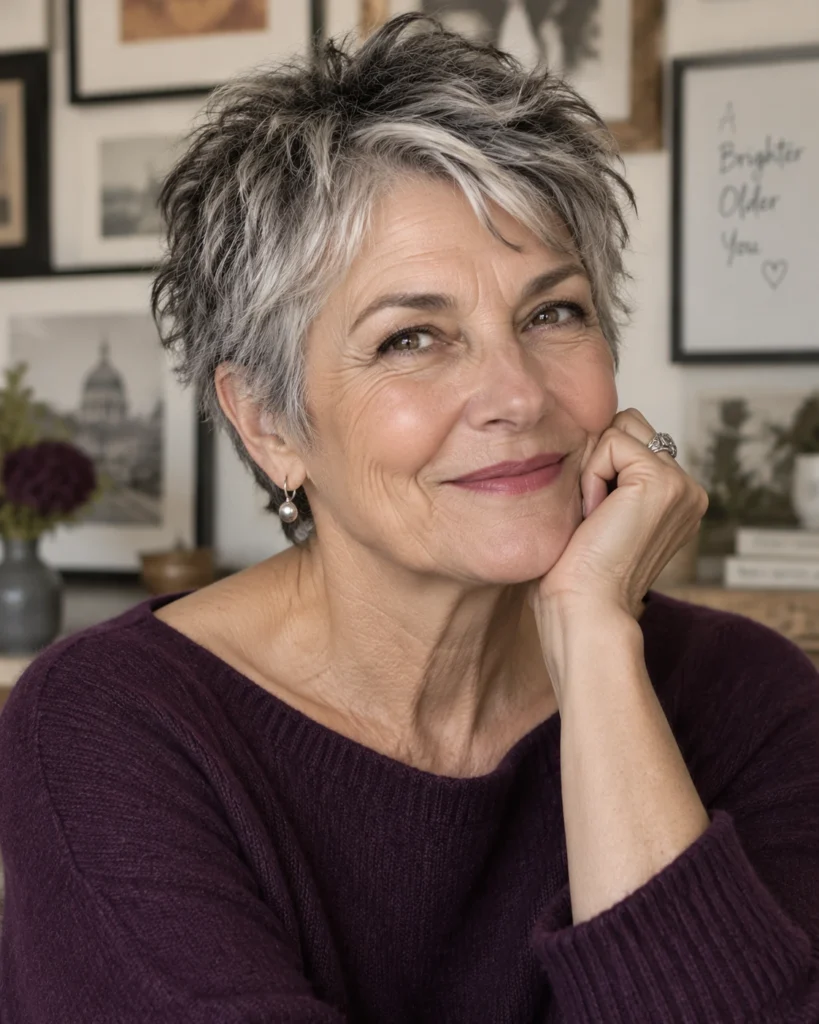
Look 15 • Natural Salt and Pepper
A choppy, irregular crop cut through a natural mix of gray and darker hair.
The two tones sit at different depths, and that contrast creates shadow across the top of the head. The eye reads shadow as volume, which is exactly the effect fine hair needs.
Best for: Natural gray transitions
Density trick: Tonal contrast that adds optical depth
Morning styling: Two minutes with a light texture spray
16. The Mini Claw Clip Half-Up Bob

Look 16 • Second-Day Rescue
Not a cut so much as a trick for a bob you already have.
Twist the crown section up and hold it with a small claw clip, leaving the rest down. Lifting the crown hides flat second-day roots instantly and gives you height where fine hair loses it first.
Best for: Chin to collarbone bobs on day two
Density trick: Crown lifted off the scalp by the clip
Morning styling: Sixty seconds
If a cut never seems to hold its shape no matter what you do, the problem is usually where the weight sits rather than how you style it. Our haircuts for fine hair guides explain how perimeter weight and layering work together, so you know exactly what to ask for.
The 3-Step Morning Volume Routine for Flat Roots
Flat roots are usually a drying problem, not a hair problem. This takes about five minutes and works on every cut above.
Step 1: Reset the roots
Mist only the roots with water to undo the shape your pillow left overnight. Then dry them lifted straight out from your head at about 90 degrees, with a nozzle on the dryer aimed at the base.
Step 2: Lock it with cool air
As water leaves the hair, the bonds inside each strand set in whatever shape they’re held. Finish with a blast of cool air while the roots are still lifted, and the shape stays put.
Step 3: Add matte grit at the part
Work a little rice starch powder or root powder along your part line with your fingertips. That grit keeps strands apart so they can’t slide back down flat.
Frequently Asked Questions
Should a woman over 60 with fine hair avoid long hair completely?
Not completely, but long fine hair needs a solid perimeter to work. Once it passes the shoulders, the ends tend to thin out and the roots flatten under the weight. Keeping it at the collarbone or just above is where most fine hair looks thickest.
How can I hide my scalp along the part without colored powders?
Move your part. A deeper side part or a soft zig-zag part scatters the hair so no clean line of scalp shows. Root lift at the part helps too, and so do lowlights close to your scalp tone. If thinning is sudden or patchy, see a dermatologist before anything else.
Are layers good or bad for fine hair over 60?
It depends on where they’re cut. Layers kept at the crown and face add lift and movement. Layers cut through the ends hollow out the perimeter and make fine hair look thinner, so ask for internal crown layers and a blunt base.
Which products work on fine silver hair without making it greasy?
Keep it light. A volumizing mousse or root spray on damp roots, a dry texture spray on dry hair, and a light leave-in mist on the ends only. Skip heavy oils and rich creams near the roots. Silver hair also absorbs product differently from pigmented hair, so check yours with our Hair Porosity Finder before buying anything new.
Final Thoughts
Fine hair after sixty doesn’t need more product. It needs a cut that spends its density wisely: a blunt base, lift where you need it, and nothing wasted on layers that thin out your ends.
Pick the cut closest to your length now, ask for it by its geometry rather than a photo alone, and give it one trim cycle to settle. The right shape will do most of the work every morning.